How to Write or Cash a Check
Writing a Check
Before you even pick up the pen, remember the golden rule: Never write a check for money you don't already have. Responsible money-managers tell their money where to go rather than wondering where it went. A check is just one way to deliver those instructions.
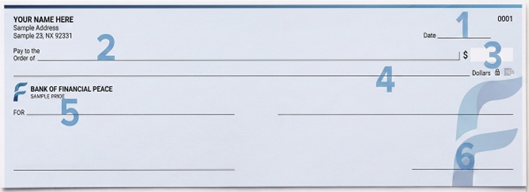
Step 1: The Date (Top Right)
Write the current date. Don’t "post-date" a check (writing a future date) hoping you’ll have the cash by Tuesday. If you’re following a zero-based budget, that money should already be sitting in your account, waiting for its assignment.
Step 2: The Payee ("Pay to the Order of")
Write the full legal name of the person or business. Avoid writing "Cash"—if you do, that check is basically a $100 bill (or whatever the amount) that anyone can pick up and spend.
Step 3: The Numeric Amount (The Box)
Write the amount clearly in numbers (e.g., $150.00). Start at the far left of the box so nobody can squeeze an extra digit in there and turn your $50 gas bill into a $550 disaster.
Step 4: The Written Amount (The Line Below)
This is where it gets "old-timey." Write the dollar amount in words and the cents as a fraction.
Example: One hundred fifty dollars and 00/100.
Pro Tip: Draw a line through any remaining blank space to the right so no one can add words like "and ninety-nine cents".
Step 5: The Memo (Bottom Left)
This is optional but great for your records. Write "Rent," "Smallest Debt," or "Car Replacement Fund." If you're paying a bill, put your account number here so the company doesn't "lose" your payment.
Step 6: The Signature (Bottom Right)
Your autograph makes it official. Don't sign it until everything else is filled out. Carrying around a signed blank check is like carrying a ticking time bomb for your bank account.

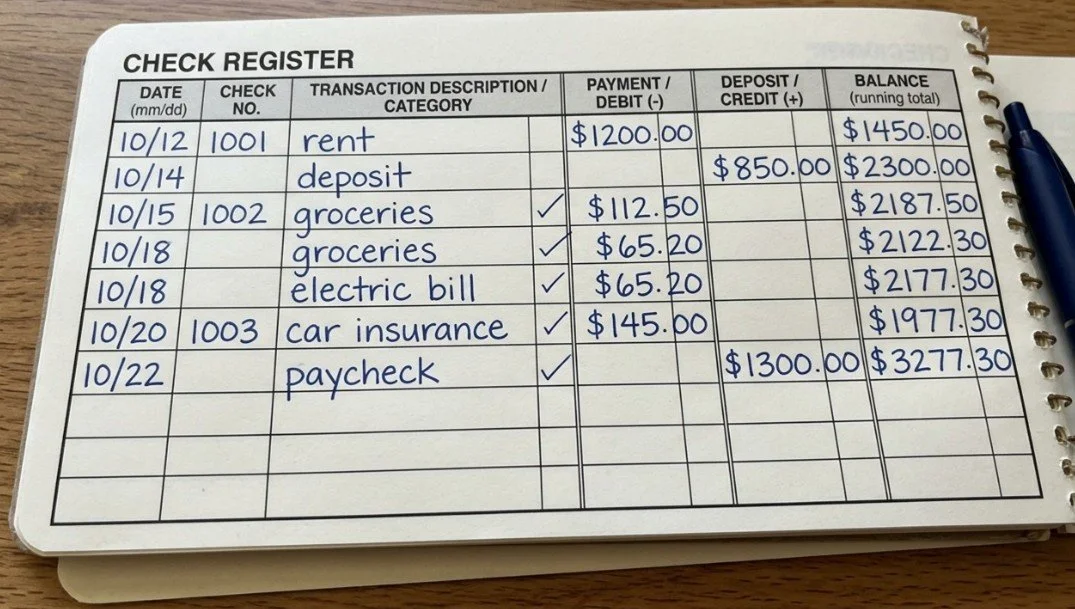
The Secret Step: Update Your Register
One of the most important part of writing a check happens after you hand it over. Immediately record the transaction in your checkbook register, your personal expense log, or your budgeting app (however you keep track of your spending). Knowing that money is spent helps ensure you don't accidentally spend that money twice.
By treating every check with this level of respect, you aren't just paying a bill, you're practicing the discipline required to live like no one else, so that later, you can live (and give) like no one else.
Cashing a Check
What if you’re receiving a check that you need to cash?
Make sure everything on the front of the check is accurate (it’s made out to you for the correct amount), and don’t try to cash it before the date on the upper right.
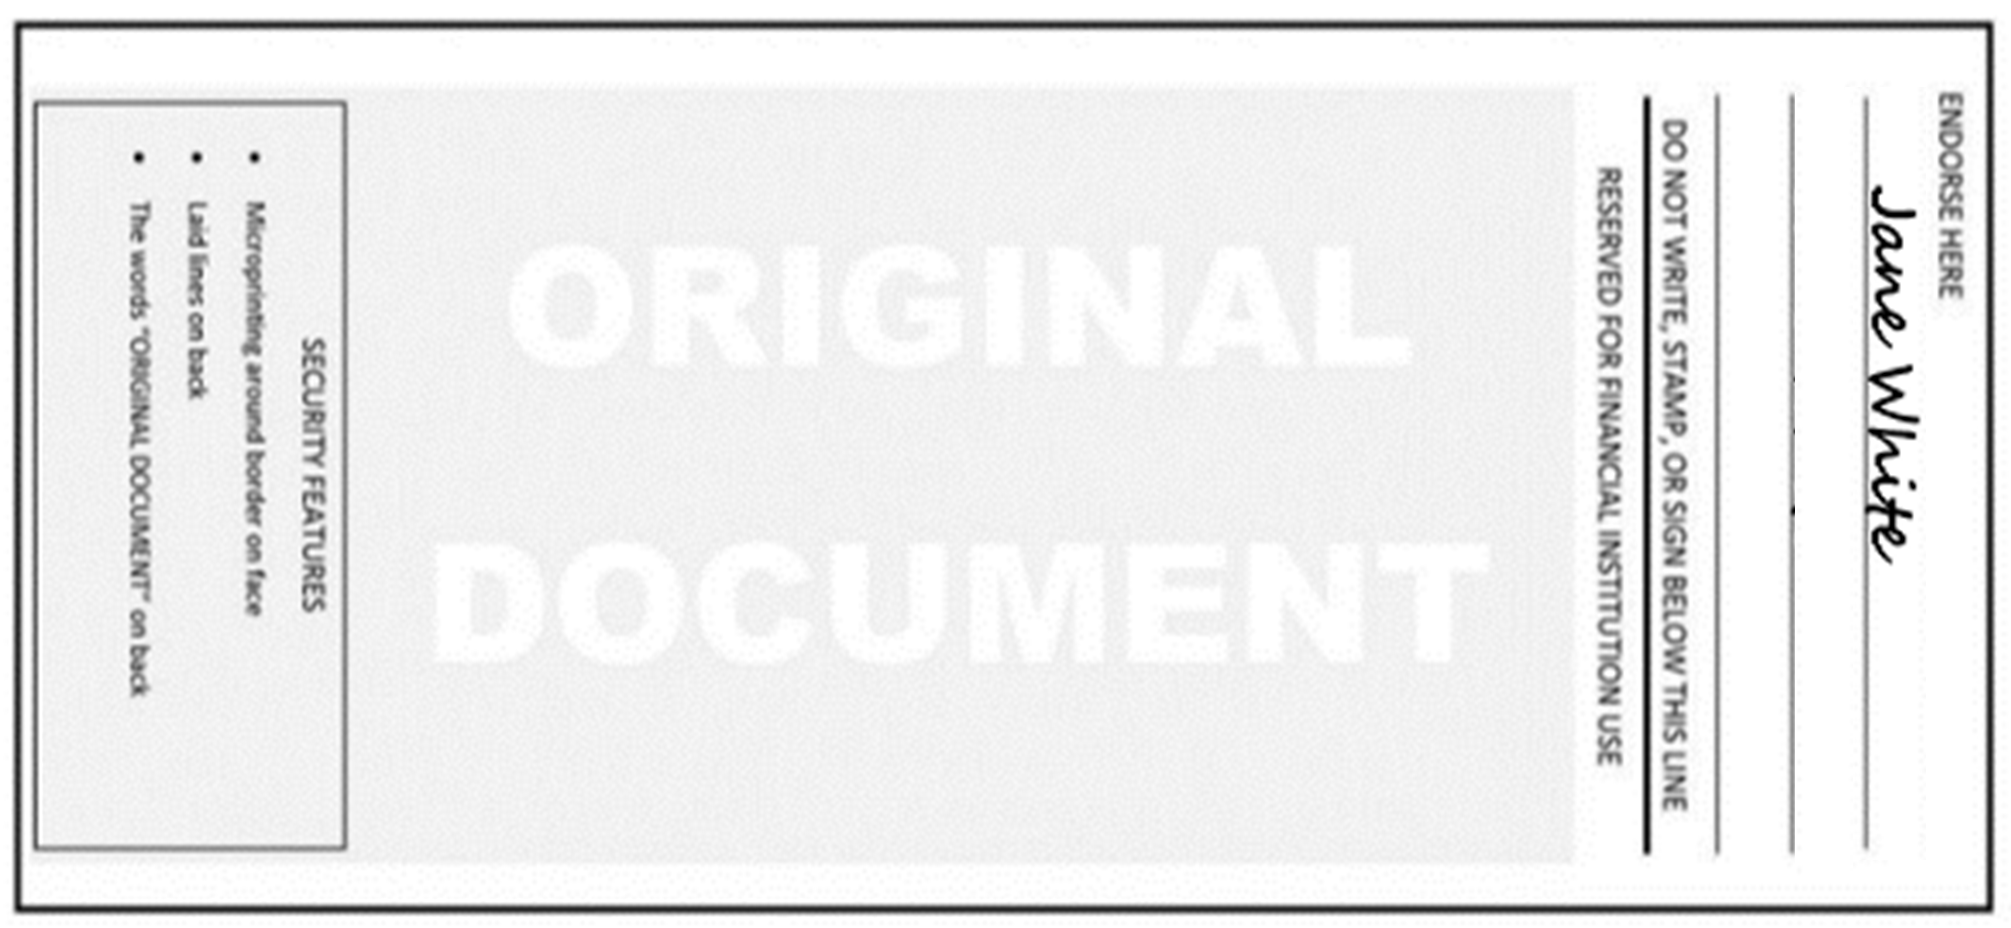
Next, flip it over, rotate it, and sign your name on the top line.
Then you have a choice: take the check to your credit union or bank – or – use your institutions banking app to deposit the check electronically.
Credit Union or Bank
If you go to the credit union or bank in-person, go up to the teller counter, hand over the check, and let them know into which of your accounts you’d like to deposit it, or if you would like to receive cash immediately. They’ll ask you for proof of your identity: things like your name, account number, membership number, last four of your social security number, a drivers license – some combination of those.
Then they’ll keep the check and put the money in your account where it will be accessible soon (ask how soon if you want to be sure of when the funds will be available), or they’ll count out the cash and hand it to you. If you deposited the check, they can give you a receipt to confirm the transaction which will likely include your account balance.
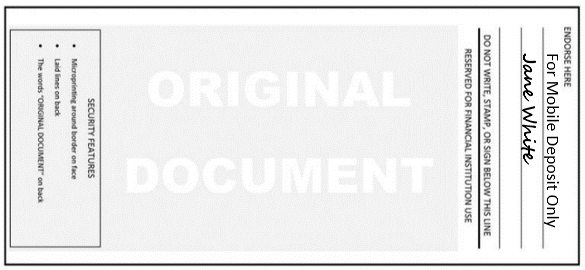
Banking App
Your banking institution will have special procedures for you to follow that will be outlined in the app as you go through the Deposit a Check process. One of those procedures will be to write something like “For electronic deposit only at [Institution Name].” above or below your signature on the back of the check. You also may need to specify into which of your accounts you would like the money deposited.
Then you’ll be instructed to take pictures of the front and back of the check using your device’s camera right through the app.
Submit your electronic deposit request, and the funds will be available in your account soon. Unfortunately, you can’t get the cash in hand this way, but you are able to get it from an ATM (Automated Teller Machine) or by going to your bank or credit union in person after the check posts to your account.
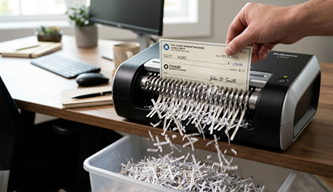
What do you do with the check after you deposited it?
Hang onto it in a safe and secure place until the funds are available in your account. Once you confirm they are in there by checking your account balance in person or on your banking app, then you should shred the check and recycle the remains. Those numbers on the bottom of the check are important: they identify your banking institution and your account number. You don’t want anyone getting their hands on that!